どうもこんにちは、relaxo(@relaxo_tbc)です。
今回はZBrushでの、「基本的なマスキング」を紹介したいと思います。
※ZBrush2020で検証しています。
マスキングの基本的な動作
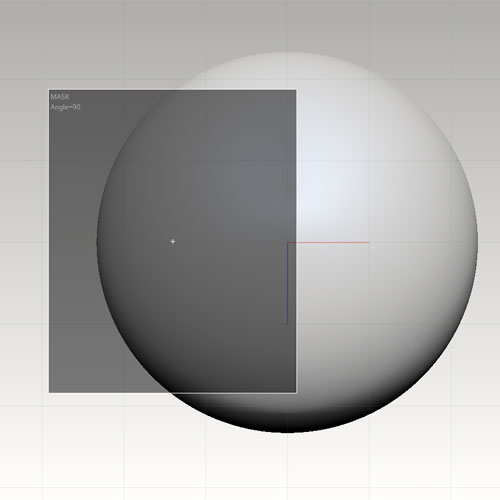
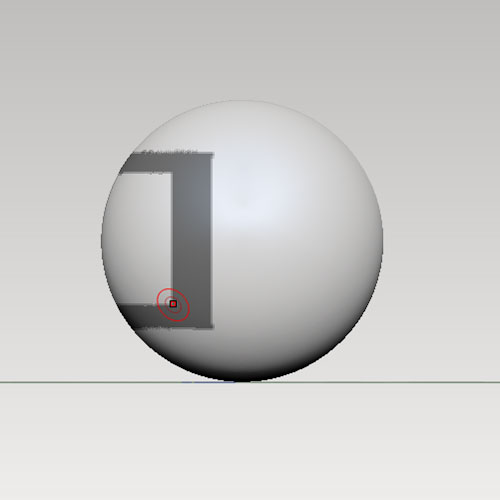
ctrlキーを押しながら、メッシュがないところで引っ張るとマスキングの矩形をつくることができます。
ctrlキー+Altキーを同時押しで、「マスキングの反転」になります。
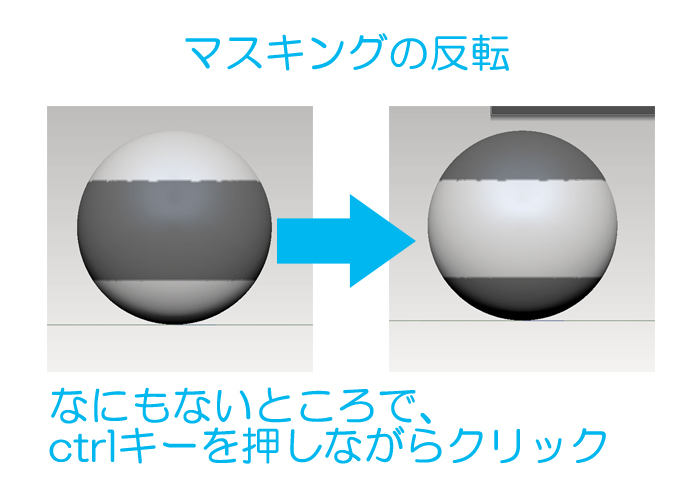
メッシュではないところで「ctrlキー+クリック」でマスキングが反転します。
「ctrlキー+A」ですべてのメッシュをマスキング。
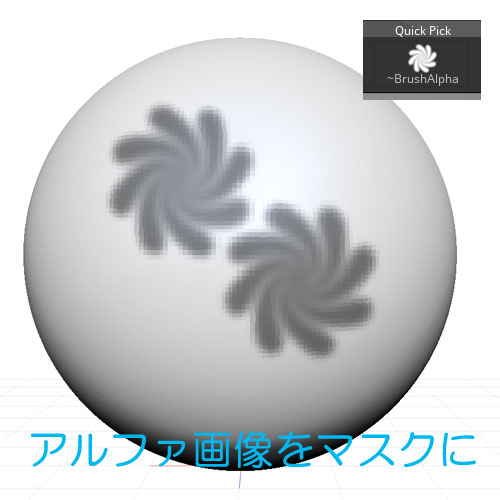
アルファ画像を選択することができるので、好きな形状でマスキングすることも可能。
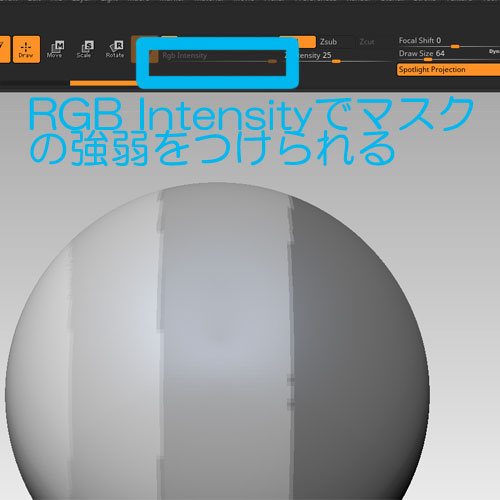
RGB Intensityでマスクの強弱をつけることができる。
マスキングの種類
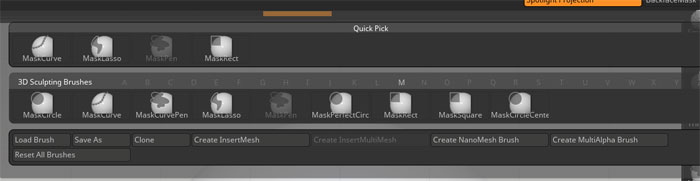
マスキングの種類はこんな感じ。
ctrlキーを押しながらブラシタブを押すと、この画面がでてきます。
■マスクペン
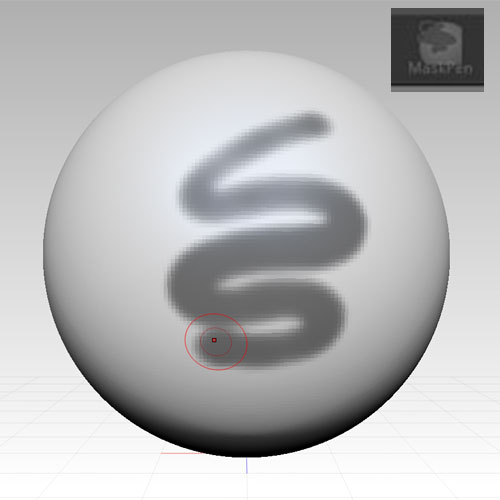
ペンのようにマスクを描ける。
メッシュがないところだと、矩形(四角)でマスクを展開できる。
■MaskRect(マスクレクト)
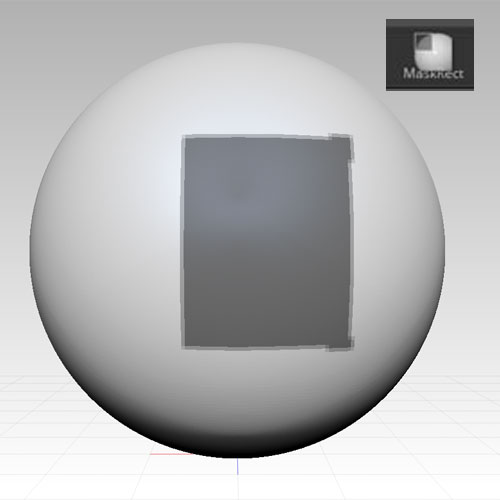
メッシュの上で四角いマスクを描く。
■MaskCircle(マスクサークル)
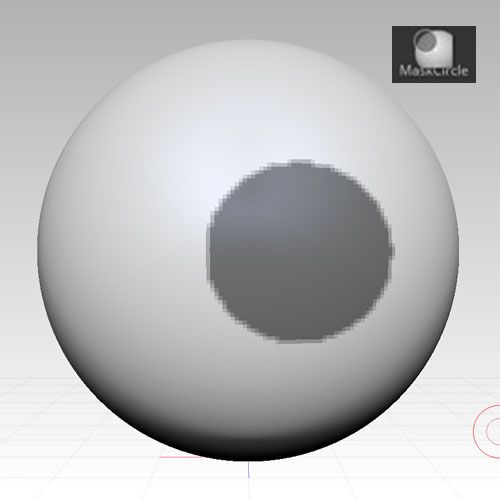
メッシュの上に丸いマスクを描く。
■MaskLasso(マスクラッソ)
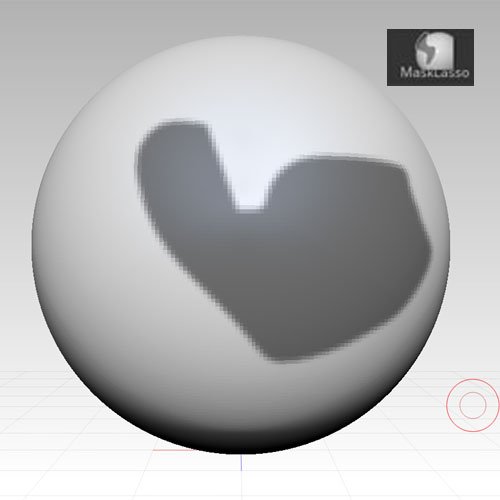
投げ縄でマスクを描ける。
■MaskCurve(マスクカーブ)
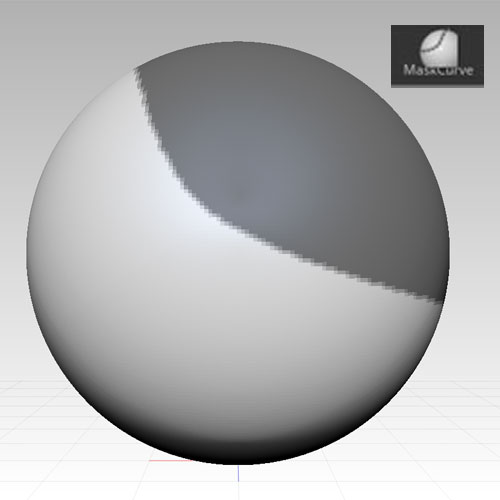
カーブブラシの挙動でマスクが描ける。
・途中でAltキーを押すとカーブを、そのポイントで曲げることができる。
■MaskPerfectCircle(マスクパーフェクトサークル)
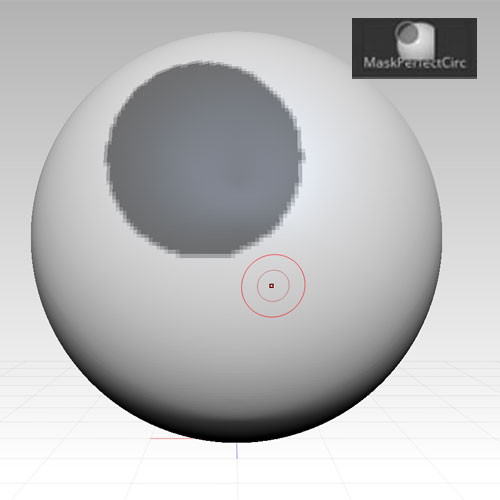
クリックしたところから正円マスクが広がっていく。
■MaskSquare(マスクスクエア)
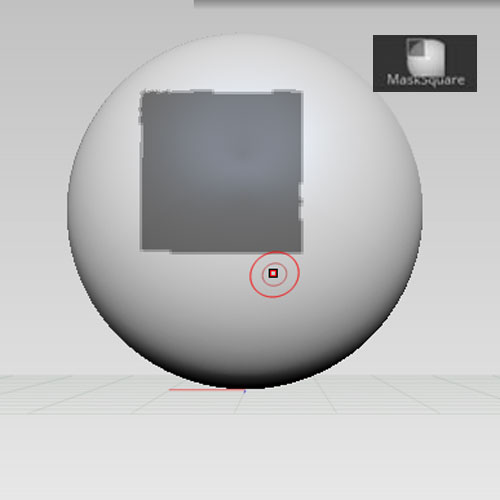
クリックしたところから真四角マスクが広がっていく。
と、まあ色々とマスクにも種類がありますが……
よく使うのは「マスクペン」「MaskRect」「MaskLasso」あたりですかねぇ
マスキングをぼやかす、シャープにするなどの変形
マスキングはそのままで使うこともあるけれど、ぼやかしたりして使うことが多いかもです。
こんな感じでMaskRect(マスクレクト)でマスキングをしたものを基準とします。
■BlurMask(ブラーマスク)

マスキングのタブの中に収容されている「BlurMask」をクリックすると、
マスクの境界線を保たないままマスクがぼやけていきます。
■SharpenMask(シャープンマスク)
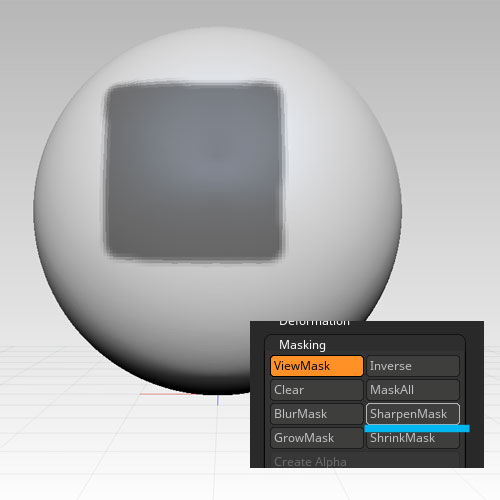
「BlurMask」の反対効果。
ぼやけたマスクをシャープにしていく。
■GlowMask(グローマスク)
マスキングが広がっていく。
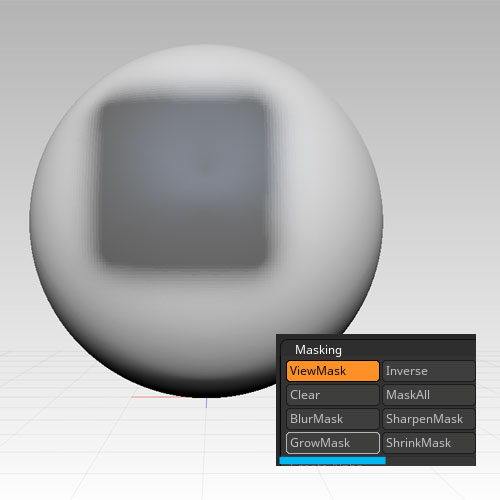
■ShrinkMask(シュリンクマスク)
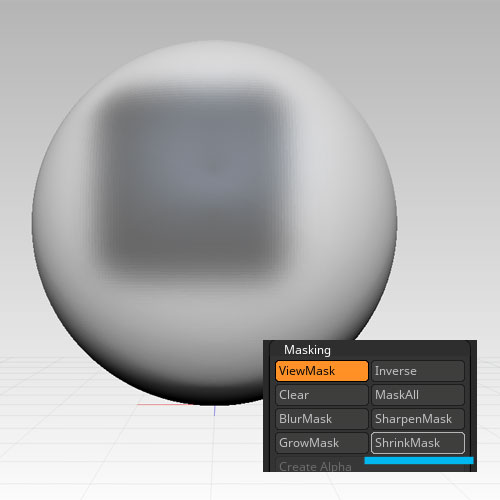
マスクの境界線の縁を残しつつぼやけていく。
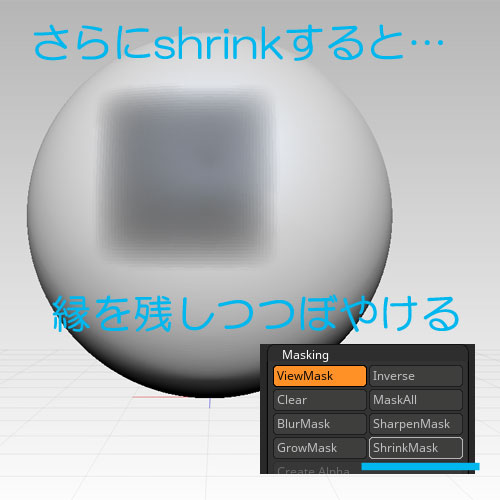
さらにShrinkすると分かりやすい。縁が残りつつぼやけていっています。
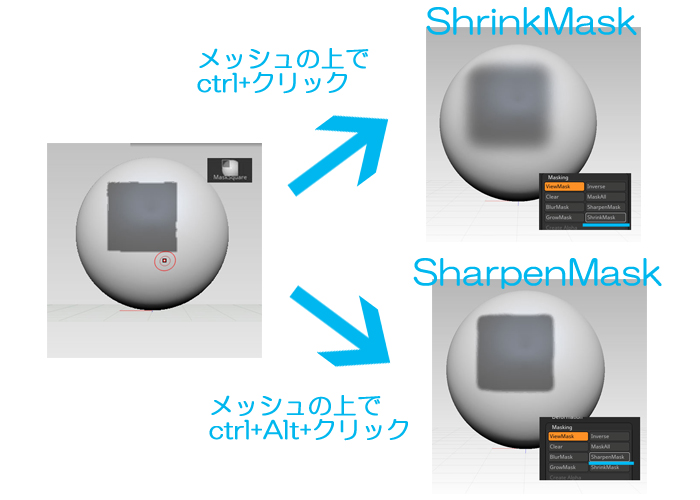
またマスキングのタブからではなくて、ショートカットキーでも
「ShrinkMask(シュリンクマスク)」と「SharpenMask(シャープンマスク)」の効果を得ることができます。
・メッシュの上でctrlキー+クリック⇒ShrinkMask(シュリンクマスク)
・メッシュの上でctrl+Alt+クリック⇒SharpenMask(シャープンマスク)
強くマスキングをかけたい
もっと強くぼやけるマスキングをかけたい場合……
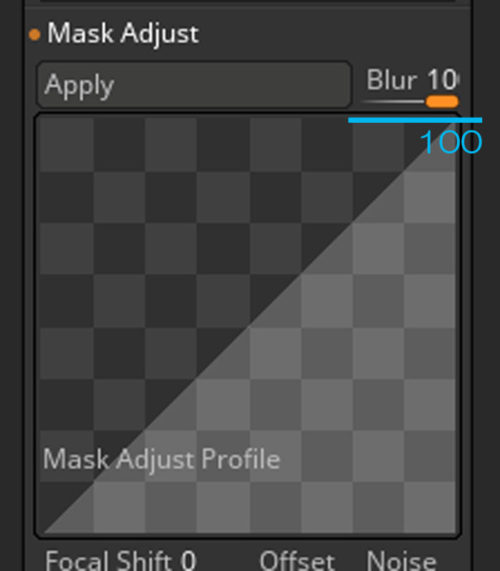
Masking > Mask Adjust を開いて
Blurのスライダーを「100」にして
線グラフを上記のようなまっすぐにします。
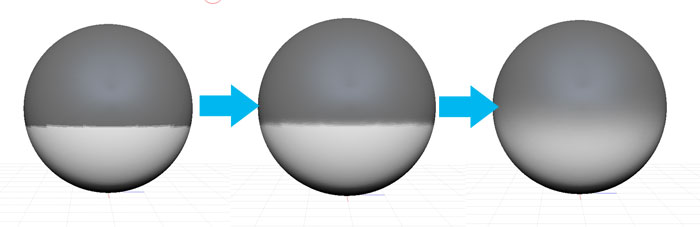
「Apply」を何度か押すと、かなり強くマスキングをぼかすことができます。
ポーズをつけたりする時に、マスキングがあると動かしたくない部分を動かさずに済むので便利です!
【追記】ポリグループを併用して便利にマスキングする
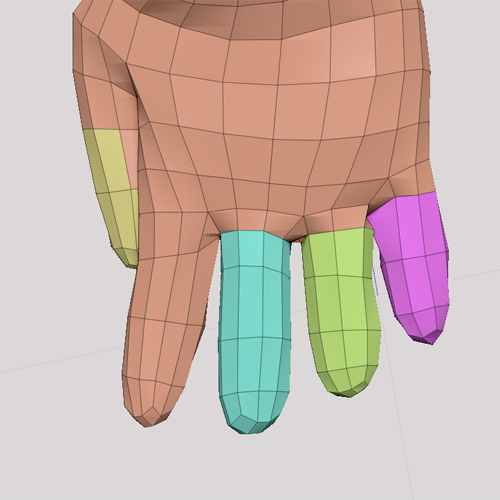
動かしたい手の指のような箇所はポリグループ分けしてあると、動かすのに便利です。
そんな時もマスキングを使います。
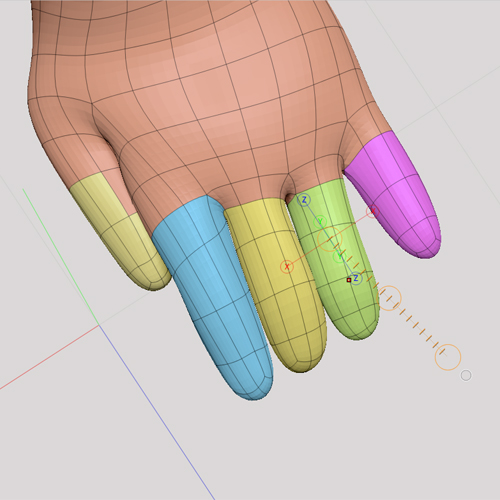
トランスポーズアクションラインを表示してから、
3Dギズモとトランスポーズの切り替えはYキーで可能。
ドローモードに戻る際はQキーをクリック。
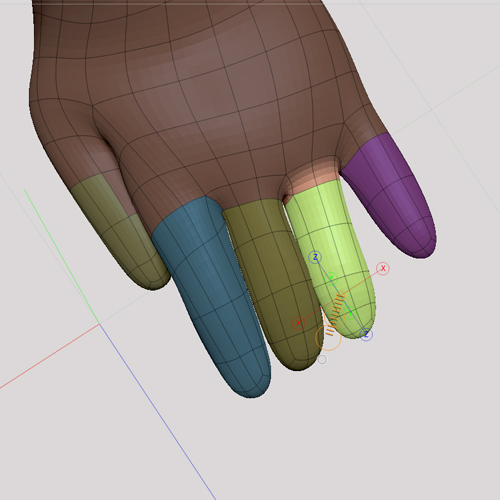
動かしたいポリグループだけを、「ctrlキー」を押しながらクリックすると、クリックしたポリグループ以外にマスキングをかけてくれます。
便利な機能なので覚えておくと良きかもです!
他にも「MaskByIntensity」を使って刀紋を作ってみたり……
トランスポーズスマートマスキングで段差のある部分に、楽々にマスキングをしたり……
色んなマスキングの仕方を紹介していますので、よかったらこちらも!